What makes the perfect dessert truly unforgettable? For me, it’s all about the combination of moist homemade cake and a show-stopping pastel rainbow ombre drip design, featuring buttery vanilla and rich chocolate flavors. This easy recipe is a family favorite that’s perfect for a quick weeknight dinner party. Save this idea for your next celebration and get ready to impress your guests with a beautifully crafted cake. Try it soon and enjoy the oohs and aahs from your loved ones, then pin for later to recreate at home.
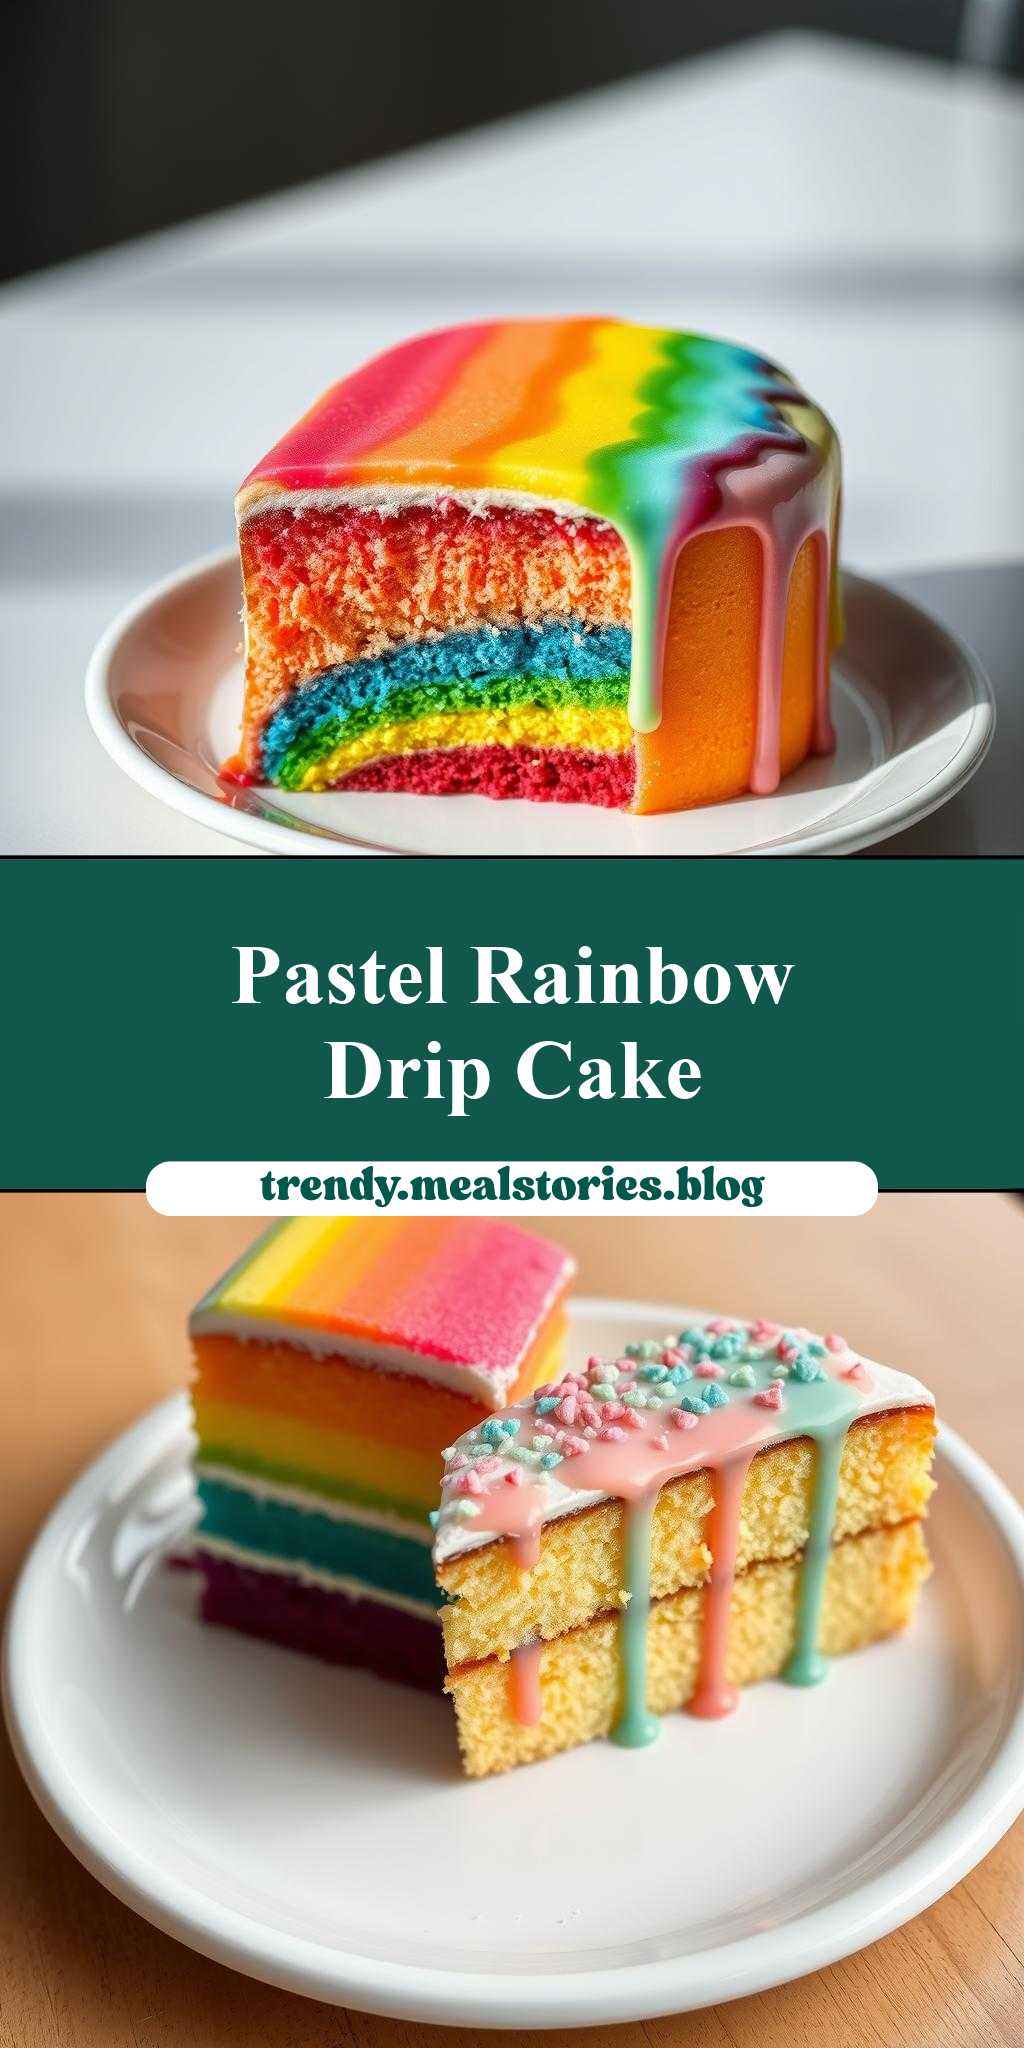
two different types of rainbow ombre drip cake with the words pastel rainbow on top
Introduction
Baking a cake that’s as visually stunning as it is delicious can seem like a daunting task, but with the right recipe and a bit of creativity, you can achieve a masterpiece that will impress both kids and adults alike. Introducing the two different types of rainbow ombre drip cake with the words pastel rainbow on top, a recipe that combines the magic of pastel colors with the simplicity of using everyday ingredients. This cake is not just a treat for the taste buds but also a feast for the eyes, making it perfect for birthdays, weddings, or any celebration where you want to make a statement. The best part? It’s easier to make than you think, and with a few clever tricks, you can ensure that your cake turns out moist, flavorful, and visually stunning.
Why This Works
- Flavor balance and ingredient accessibility: The recipe uses a balance of vanilla and butter to create a moist and flavorful cake, and all the ingredients are easily accessible in most supermarkets.
- Ease of preparation: Despite its impressive appearance, the cake is relatively simple to prepare, requiring basic baking skills and minimal special equipment.
- Impressive results with minimal effort: The ombre effect and pastel rainbow on top give the cake a professional finish that belies the simplicity of the recipe, making it perfect for those who want to impress without spending hours in the kitchen.
Key Ingredients
The key to a successful rainbow ombre drip cake lies in the quality of the ingredients. For the cake itself, you’ll need all-purpose flour, granulated sugar, unsalted butter, eggs, vanilla extract, and whole milk. For the buttercream frosting, you’ll need unsalted butter, powdered sugar, vanilla extract, and a pinch of salt. To achieve the pastel rainbow effect on top, you’ll need food coloring in pastel shades. Practical substitutions can be made for some ingredients, such as using almond milk instead of whole milk for a non-dairy version or substituting some of the granulated sugar with honey for a slightly different flavor profile.
Instructions
- Step 1: Begin by preheating your oven to 350°F (175°C). Prepare three 8-inch round cake pans by greasing them and lining the bottoms with parchment paper. In a medium bowl, whisk together flour, sugar, and a pinch of salt. In a large bowl, using an electric mixer, beat the butter until creamy, then add eggs one at a time, beating well after each addition. Gradually add the dry ingredients to the butter mixture, alternating with milk, beginning and ending with the dry ingredients. Beat in vanilla extract.
- Step 2: Divide the batter evenly among the prepared pans and smooth the tops. Bake for about 25-30 minutes or until a toothpick inserted in the center comes out clean. Let the cakes cool in the pans for 5 minutes, then transfer them to a wire rack to cool completely.
- Step 3: To make the buttercream frosting, beat the butter in a large bowl until light and fluffy. Gradually add the powdered sugar, beating until smooth and creamy. Beat in vanilla extract and a pinch of salt. Divide the frosting into three portions and color each portion with a different pastel shade to achieve the ombre effect.
- Step 4: To assemble the cake, place one cake layer on a serving plate and spread a layer of frosting on top. Repeat this process with the remaining two cake layers, creating an ombre effect with the frosting. For the drip effect, melt a small amount of white chocolate and add a few drops of pastel food coloring. Drizzle the colored chocolate over the top of the cake, allowing it to drip down the sides. Write “pastel rainbow” on top using chocolate or frosting to complete the look.
Handy Tips
- To ensure that your cake layers are even, make sure to level them after they have cooled. This can be done using a cake leveler or a serrated knife.
- For a more vibrant pastel effect, use high-quality food coloring and mix it with a small amount of frosting or buttercream to create a paste before adding it to the larger portion of frosting.
- Avoid overmixing the batter or the frosting, as this can result in a dense cake or a too-stiff frosting that’s hard to work with.
Heat Control
When baking the cake, it’s crucial to maintain the right temperature and to not overbake. The ideal temperature is 350°F (175°C), and the cakes are done when a toothpick inserted into the center comes out clean. Overbaking can lead to dry cakes, so keep an eye on them after the 25-minute mark and check frequently.
Crunch Factor
The crunch factor in this recipe comes from the drip effect on the outside of the cake. To achieve a nice crunch, make sure the chocolate or candy melts you’re using are of high quality and melt them correctly. If using white chocolate, be careful not to overheat it, as it can seize up and become grainy.
Pro Kitchen Tricks
- Use a turntable to display your cake, especially if you’re planning to serve it at a party or event. This allows everyone to see the cake from all angles and can make it easier to serve.
- For a professional finish, chill the cake in the refrigerator for about 30 minutes before serving. This will help set the frosting and make the cake easier to slice cleanly.
- Consider using a cake stand with a non-slip bottom to prevent the cake from sliding or toppling over, especially if you’re transporting it.
Storage Tips
- Store the cake in an airtight container at room temperature for up to 3 days. If you won’t be serving the cake within this timeframe, consider freezing it. Wrap the cake tightly in plastic wrap or aluminum foil and place it in a freezer-safe bag. Frozen cake can be stored for up to 2 months.
- To reheat, simply thaw the cake overnight in the refrigerator and let it come to room temperature before serving.
- For the best results, use airtight, moisture-proof containers to store leftover cake. This will help keep the cake fresh and prevent it from drying out.
Gift Packaging Ideas
If you’re planning to give the cake as a gift, consider packaging it in a decorative cake box or wrapping it in colorful cellophane. You can also add a personal touch with a gift card or a handwritten note. For a more rustic look, wrap the cake in a piece of parchment paper or a tea towel and tie it with twine. This not only protects the cake during transport but also adds a charming, homemade touch to the gift.
Flavor Variations
- Different spices: Consider adding a pinch of salt or a teaspoon of cinnamon to the batter for a unique flavor twist.
- Creative toppings: Instead of the traditional pastel rainbow on top, try using fresh fruits, nuts, or even candy pieces to create a personalized look.
- Ingredient swaps: For a gluten-free version, substitute the all-purpose flour with a gluten-free flour blend. For a vegan version, use plant-based milk and replace the eggs with flax eggs or applesauce.
Troubleshooting
- Texture problems: If your cake turns out too dense, it might be due to overmixing the batter. If it’s too dry, it could be because the cakes were overbaked.
- Ingredient replacements: If you’re missing an ingredient, don’t be afraid to get creative with substitutions. Just remember that substituting ingredients can sometimes affect the final texture or flavor of the cake.
- Over/undercooking signs: Keep an eye on your cakes while they’re baking. If they’re done, a toothpick inserted into the center should come out clean. If the toothpick comes out with wet batter, the cakes need more time. If the tops start to brown too quickly, cover the pans with foil to prevent overbrowning.
FAQs
- Can I freeze it? Yes, you can freeze the cake for up to 2 months. Wrap it tightly in plastic wrap or aluminum foil and place it in a freezer-safe bag.
- Is it gluten-free? The original recipe is not gluten-free, but you can make a gluten-free version by substituting the all-purpose flour with a gluten-free flour blend.
- Can I double the recipe? Yes, you can double the recipe if you need a larger cake. Just keep in mind that you’ll need to adjust the baking time accordingly.
Conclusion
Making a two different types of rainbow ombre drip cake with the words pastel rainbow on top is a fun and rewarding baking project that’s sure to impress your family and friends. With its moist and flavorful cake layers, vibrant pastel colors, and stunning drip effect, this cake is perfect for any celebration. Don’t be afraid to get creative and make the recipe your own, whether that means trying out new flavor combinations or experimenting with different decorating techniques. Happy baking, and enjoy the joy and satisfaction of creating something truly special and delicious!
two different types of rainbow ombre drip cake with the words pastel rainbow on top
A recipe for a visually stunning and delicious rainbow ombre drip cake with a pastel rainbow on top, perfect for celebrations and special occasions.
🥘 Ingredients
👩🍳 Instructions
-
1Preheat the oven to 350°F (175°C). Prepare three 8-inch round cake pans.
-
2In a medium bowl, whisk together flour, sugar, baking powder, and salt.
-
3In a large bowl, using an electric mixer, beat the butter until creamy. Add eggs one at a time, beating well after each addition.
-
4Gradually add the dry ingredients to the butter mixture, alternating with milk, beginning and ending with the dry ingredients. Beat in vanilla extract.
-
5Divide the batter evenly among the prepared pans and smooth the tops. Bake for about 25-30 minutes or until a toothpick inserted in the center comes out clean.
-
6Let the cakes cool in the pans for 5 minutes, then transfer them to a wire rack to cool completely.
-
7To make the buttercream frosting, beat the butter in a large bowl until light and fluffy. Gradually add the powdered sugar, beating until smooth and creamy. Beat in vanilla extract.
-
8To assemble the cake, place one cake layer on a serving plate and spread a layer of frosting on top. Repeat this process with the remaining two cake layers, creating an ombre effect with the frosting.
-
9For the drip effect, melt a small amount of white chocolate and add a few drops of pastel food coloring. Drizzle the colored chocolate over the top of the cake, allowing it to drip down the sides.
-
10Write 'pastel rainbow' on top using chocolate or frosting to complete the look.