What’s the secret to making cannoli at home without all the fuss? These mini cannoli cups are a quick and easy dessert solution, filled with sweetened ricotta cheese and chocolate chips. Perfect for a weeknight treat or family favorite dessert, they’re incredibly simple to whip up. Save this idea for a homemade dessert that’s sure to impress, try it soon!
Mini Cannoli Cups Recipe
Introduction
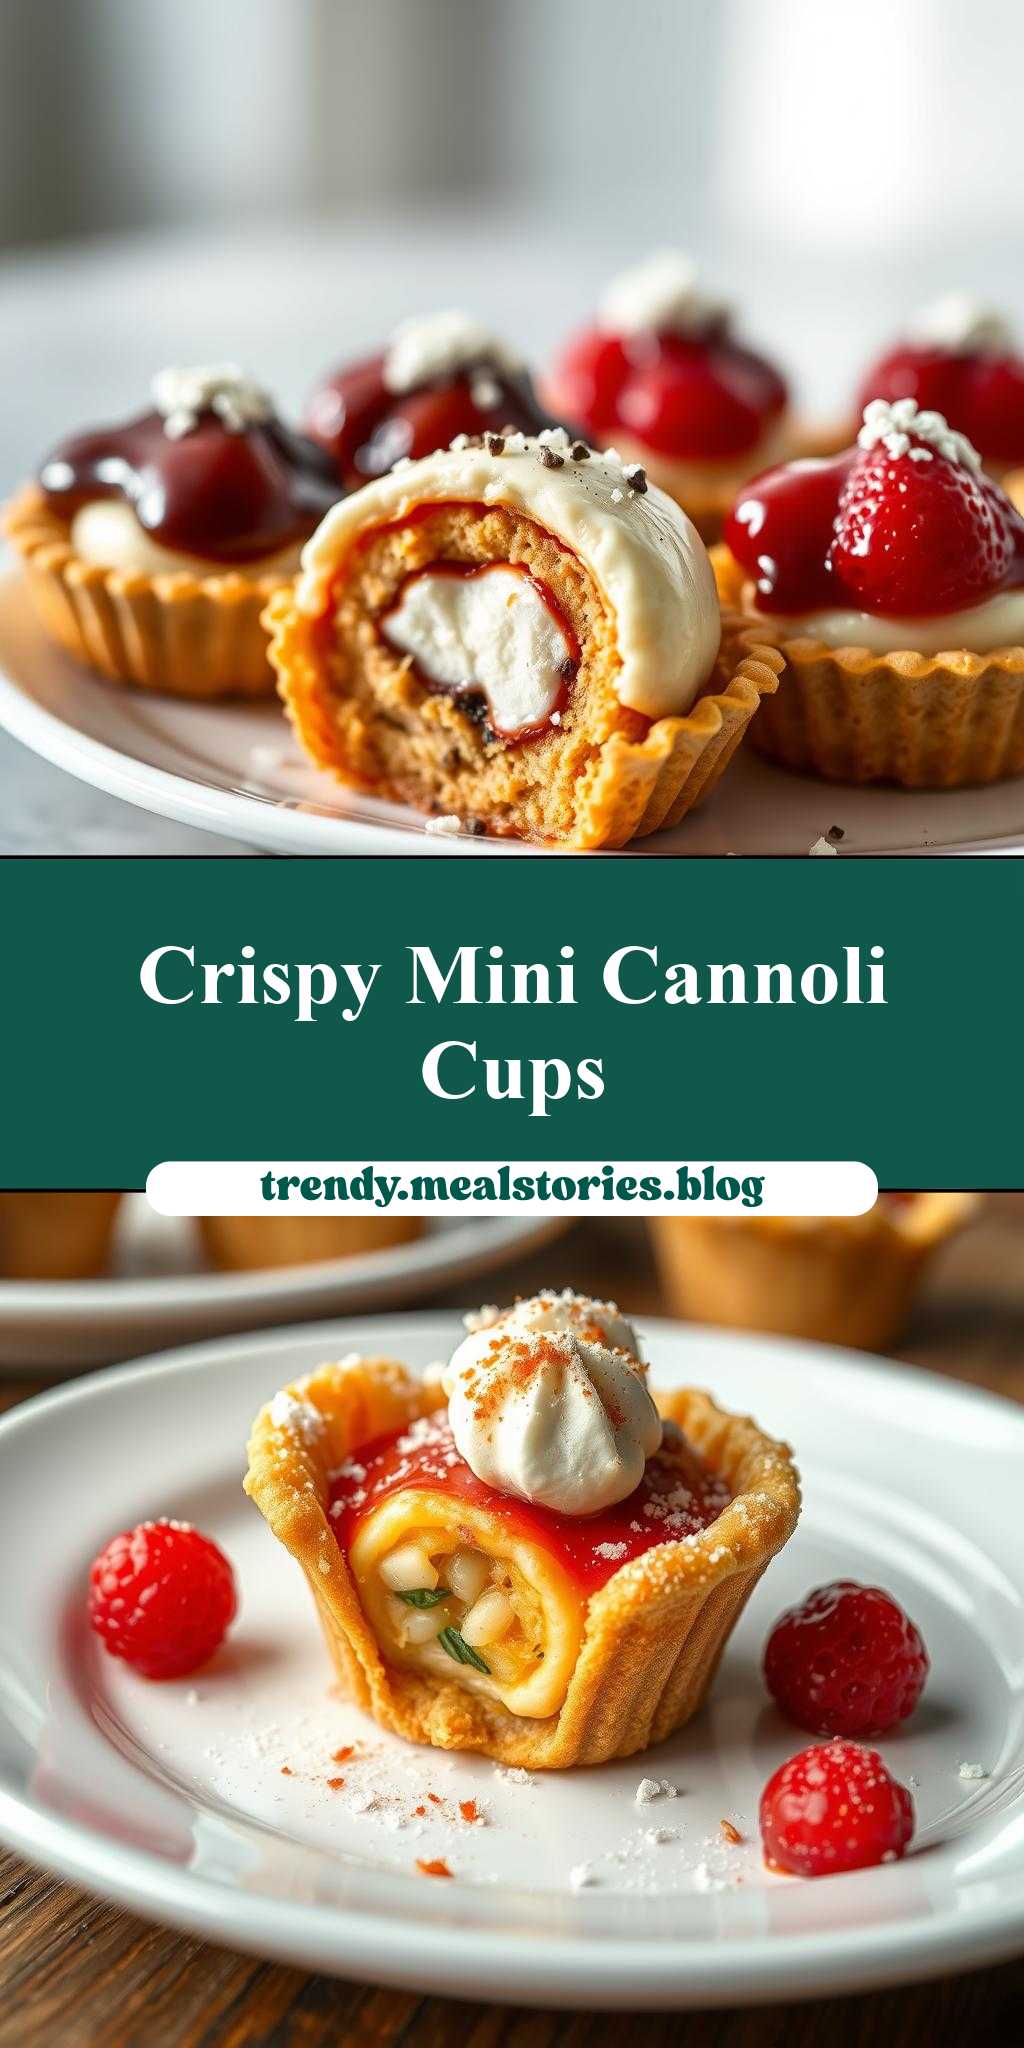
Indulge in the delightful world of Italian pastries with our Mini Cannoli Cups Recipe, a creative twist on the classic Sicilian dessert. These bite-sized treats are not only a feast for the eyes but also a symphony of flavors and textures, combining the crunch of fried pastry shells with the sweetness of creamy fillings. What makes this recipe truly special is its accessibility and ease of preparation, using everyday ingredients to create an impressive dessert that’s perfect for any occasion, from casual gatherings to special celebrations. With a little creativity, you can turn these mini cannoli cups into personalized masterpieces, tailored to your taste preferences and dietary needs.
Why This Works
- Flavor balance and ingredient accessibility: This recipe strikes a perfect balance between traditional cannoli flavors and the convenience of using widely available ingredients, making it easy for anyone to replicate at home.
- Ease of preparation: Despite its elegant appearance, the Mini Cannoli Cups Recipe is surprisingly straightforward, requiring minimal specialized equipment and technique, making it accessible to bakers of all skill levels.
- Impressive results with minimal effort: The combination of store-bought pastry cups (or easily made pastry shells) and a simple, yet decadent, filling mixture ensures that you achieve professional-looking results with less fuss, perfect for impressing friends and family without spending hours in the kitchen.
Key Ingredients
The magic of the Mini Cannoli Cups lies in its well-balanced ingredients. For the shells, you can either use pre-made pastry cups or make your own using flour, lard or butter, vinegar, and water. The filling is a delightful mix of sweetened ricotta cheese, confectioners’ sugar, vanilla extract, and chocolate chips. Practical substitutions can enhance the recipe further, such as using different types of cheese or adding nuts for extra texture. For those looking for alternatives, almond milk or coconut cream can replace traditional dairy in the filling, and gluten-free flours can be used for the pastry, making this dessert adaptable to various dietary needs.
Instructions
- Step 1: Begin by preparing your ingredients. If making your own pastry shells, combine flour, lard or butter, vinegar, and water in a bowl and knead until a smooth dough forms. Wrap and let it rest. For the filling, mix ricotta cheese, confectioners’ sugar, and vanilla extract in another bowl until smooth and creamy.
- Step 2: Cook or bake your pastry shells according to your method. If using pre-made cups, skip to filling preparation. For homemade shells, roll out the rested dough thinly and use a cookie cutter or the rim of a glass to cut out circles. Fry these circles in hot oil until they are golden and bubbly, then let them cool and harden into their signature tube shapes.
- Step 3: Layer your flavors and textures. Fill a piping bag with the ricotta mixture and pipe into the cooled pastry shells. Top with chocolate chips or shavings for an added layer of flavor and visual appeal.
- Step 4: Final touches and plating. Arrange your mini cannoli cups on a platter or individual plates. You can dust them with confectioners’ sugar or add a sprinkle of cinnamon for extra flavor and decoration. Serve chilled and enjoy the delightful combination of crunchy shells and creamy filling.
Handy Tips
- For a lighter pastry, ensure your oil is at the right temperature before frying the shells. Too hot, and they’ll burn; too cold, and they’ll absorb too much oil.
- Don’t overfill the pastry cups, as this can make them difficult to handle and may cause the filling to spill out.
- Experiment with different fillings and toppings to create unique flavor combinations that suit your taste or the occasion.
Heat Control
If you’re choosing to fry your own pastry shells, heat control is crucial. The ideal temperature for frying is between 375°F and 400°F. Fry the shells until they are golden brown, which should take about 2-3 minutes on each side, depending on the temperature and the size of your shells. Signs of doneness include a golden color and a crispy texture. Always use a thermometer to ensure the correct temperature, and never leave frying oil unattended.
Crunch Factor
Achieving the perfect crunch in your mini cannoli cups is key to their appeal. For the shells, this comes from frying them to the right crispiness. To maintain this crunch, it’s essential to fill the shells just before serving, as the filling can make the pastry soften over time. For an extra crunchy element, you can also sprinkle chopped nuts or shaved chocolate on top of the filling before serving.
Pro Kitchen Tricks
- Use high-quality ingredients: The taste and texture of your ricotta filling and the freshness of your pastry will significantly impact the final result.
- Keep it simple: Don’t overcomplicate the filling or the toppings. Sometimes, less is more, especially with a dessert as classic and beloved as cannoli.
- Cleanup hack: For easier cleanup after frying, line your pot or deep fryer with a disposable liner, and have a tray lined with paper towels ready to drain excess oil from the fried shells.
Storage Tips
- Leftover storage: Store filled cannoli cups in an airtight container in the refrigerator for up to 24 hours. It’s best to fill the shells just before serving to maintain crispiness, but if you must store them filled, keep them chilled and consume within a day.
- Reheating tips: If your shells have softened, you can try crisping them up in a low oven (about 200°F) for a few minutes. However, be cautious not to overheat, as this can cause the shells to become too brittle or the filling to melt.
- Shelf life and containers: Unfilled pastry shells can be stored in an airtight container at room temperature for up to 2 days. The ricotta filling can be made ahead and stored in the fridge for up to 3 days. Always use clean, dry containers to prevent moisture from affecting the texture of your pastry and filling.
Gift Packaging Ideas
These mini cannoli cups make for a delightful gift, especially when packaged thoughtfully. Consider placing a few filled cups in a decorative tin or a clear plastic container, wrapped with a ribbon or a decorative gift bag. For a more personalized touch, you can add a handwritten note or a small packet of coffee or tea to complement the dessert. If you’re gifting them unfilled, package the shells and the filling separately, with instructions on how to assemble and serve, allowing the recipient to enjoy the process of creating their own mini cannoli cups.
Flavor Variations
- Different spices: Add a pinch of cinnamon, nutmeg, or lemon zest to your ricotta filling for a unique twist on the traditional flavor.
- Creative toppings: Instead of chocolate chips, try using chopped nuts, dried fruits, or even candy pieces to top your cannoli cups.
- Ingredient swaps: For a vegan version, you can replace the dairy with a non-dairy milk and use a vegan cheese alternative. Gluten-free flours can be used for the pastry to cater to gluten intolerance.
Troubleshooting
- Texture problems: If your shells are too soft, they may not have been fried at the right temperature. If your filling is too runny, you can refrigerate it for a bit to firm it up before piping.
- Ingredient replacements: Always choose replacements that have a similar texture and flavor profile to the original ingredient to ensure the best results.
- Over/undercooking signs: For fried shells, overcooking will result in a dark brown, possibly bitter taste, while undercooking will leave them pale and soft. Adjust your frying time accordingly.
FAQs
- Can I freeze it? Yes, you can freeze both the unfilled pastry shells and the ricotta filling separately for up to 2 months. Thaw and fill as needed.
- Is it gluten-free? The traditional recipe includes gluten due to the wheat flour in the pastry. However, you can easily make it gluten-free by substituting the flour with a gluten-free alternative.
- Can I double the recipe? Absolutely, this recipe can be doubled or even tripled if you’re serving a large crowd. Just ensure you have enough oil for frying if you’re making your own shells, and adjust the ingredient quantities accordingly.
Conclusion
With the Mini Cannoli Cups Recipe, you’re not just making a dessert; you’re creating an experience. These bite-sized treats are perfect for sharing, gifting, or simply enjoying on your own. The beauty of this recipe lies in its simplicity, flexibility, and the joy it brings to both the maker and the eater. Whether you’re a seasoned baker or a beginner in the kitchen, this recipe is sure to delight. So, go ahead, get creative, and indulge in the sweet, crunchy world of mini cannoli cups. Share your creations, experiment with new flavors, and most importantly, enjoy the process and the pleasure of sharing something homemade and full of love.
Mini Cannoli Cups Recipe
A creative twist on the classic Sicilian dessert, these mini cannoli cups combine crunchy pastry shells with sweet and creamy ricotta filling, perfect for any occasion.
🥘 Ingredients
👩🍳 Instructions
-
1Prepare the pastry dough by combining flour, lard or butter, vinegar, and salt in a bowl. Knead until smooth and let it rest.
-
2Roll out the dough and cut out circles. Fry these circles in hot oil until golden and bubbly, then let them cool and harden into tube shapes.
-
3Prepare the filling by mixing ricotta cheese, confectioners' sugar, and vanilla extract until smooth.
-
4Fill the cooled pastry shells with the ricotta mixture and top with chocolate chips or shavings.