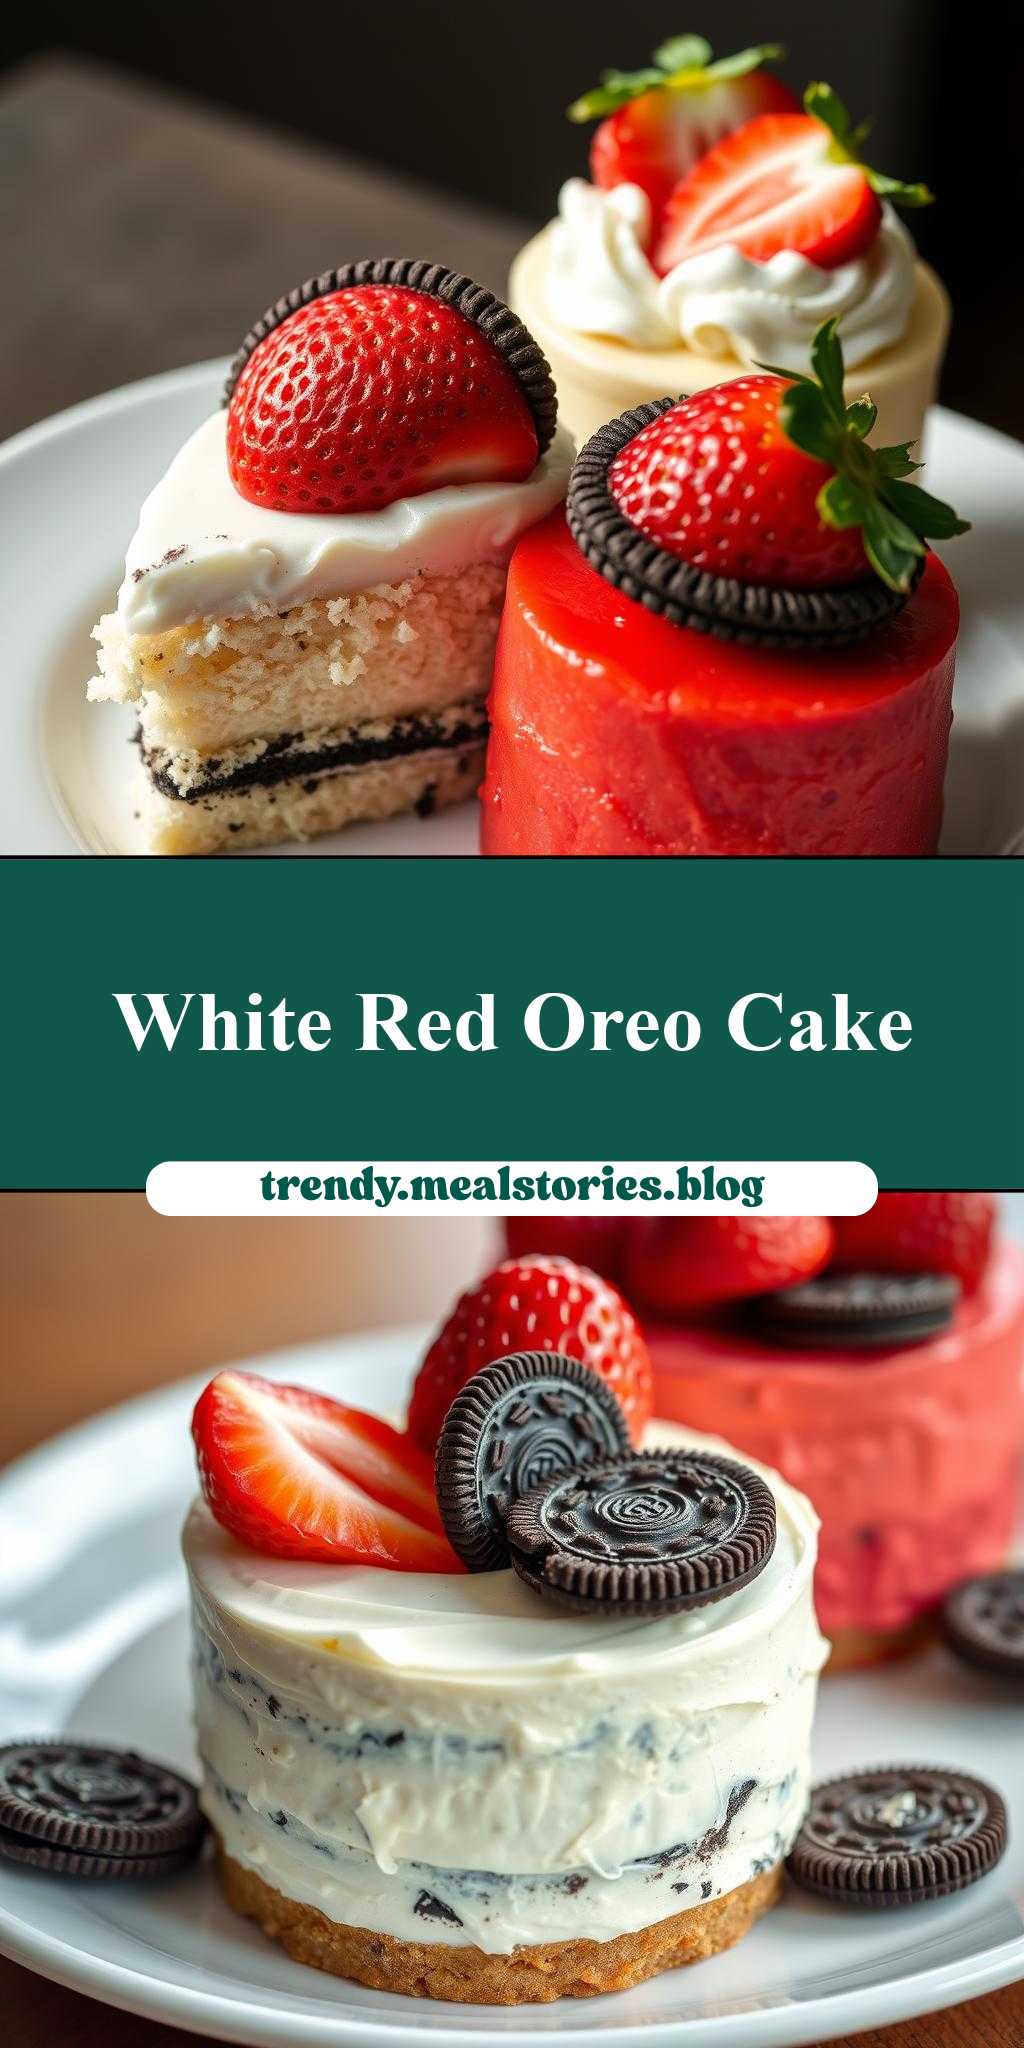
What’s the perfect pair for a sweet celebration? Rich Oreo cookies and juicy strawberries on top of moist homemade cakes, one decadent red velvet and one classic white, made easy with simple layering techniques, save this idea for your next special occasion.
Two Cakes with Oreo Cookies and Strawberries on Top, One is White and the Other is Red
Introduction
Imagine a dessert so divine, it combines the crunch of Oreo cookies, the sweetness of fresh strawberries, and the softness of moist cake, all in a visually stunning presentation of contrasting colors. This recipe for two cakes, one white and one red, topped with Oreo cookies and strawberries, is not just a treat for the taste buds but a feast for the eyes. What makes this dessert truly special is its accessibility and ease of preparation, using everyday ingredients that can be found in most kitchens. Whether you’re a seasoned baker or a beginner in the culinary world, this recipe promises to deliver impressive results with minimal effort, making it perfect for special occasions or simply as a sweet surprise for loved ones.
Why This Works
- Flavor balance and ingredient accessibility: The combination of vanilla or red velvet cake, Oreo cookies, and strawberries offers a well-balanced flavor profile that is both familiar and exciting. The ingredients are easily accessible, making this dessert achievable for anyone.
- Ease of preparation: Despite its impressive appearance, this dessert is relatively simple to prepare. The cakes can be made from scratch or using a mix, and the toppings require minimal preparation, making it a great option for those short on time.
- Impressive results with minimal effort: The contrasting colors of the cakes and the toppings create a visually appealing dessert that looks like it was made by a professional. This makes it an excellent choice for gatherings or as a gift, where presentation matters.
Key Ingredients
To make these stunning cakes, you will need a few key ingredients. For the cakes, you’ll need flour, sugar, eggs, butter or oil, and either vanilla extract for the white cake or red food coloring and cocoa powder for the red velvet cake. For the toppings, you’ll need a package of Oreo cookies and a pint of fresh strawberries. You can also use strawberry syrup or jam as an additional topping for extra flavor. Practical substitutions can be made for ingredients like butter (using margarine or a dairy-free alternative) or eggs (using flax eggs for a vegan version), making this recipe adaptable to different dietary needs.
Instructions
- Step 1: Begin by preheating your oven to 350°F (175°C). Prepare two 9-inch round cake pans by greasing them and lining the bottoms with parchment paper. Then, measure out your ingredients according to the recipe you’re using for the cake (either from scratch or a mix). If making from scratch, sift together the flour, sugar, and other dry ingredients in a large bowl. In another bowl, whisk together the wet ingredients (eggs, butter or oil, and vanilla extract or red food coloring and cocoa powder for the red velvet cake).
- Step 2: Combine the wet and dry ingredients, mixing until just combined. Do not overmix. Divide the batter evenly between the two prepared pans if you’re making the cakes from scratch. If using a mix, follow the package instructions for preparation and divide the batter accordingly. Bake the cakes for about 25-30 minutes, or until a toothpick inserted into the center of each cake comes out clean. Allow the cakes to cool completely in the pans before frosting and decorating.
- Step 3: Once the cakes are cool, you can frost them with a simple buttercream frosting (made by whipping together butter, powdered sugar, and a splash of milk or cream) or use a store-bought frosting. For the white cake, a plain buttercream is perfect, while the red velvet cake can be paired with a cream cheese frosting for an extra tang. After frosting, it’s time to decorate with Oreo cookies and sliced strawberries. You can arrange the Oreos in a pattern on top of the cakes or simply place them in the center. Slice the strawberries and arrange them around the Oreos or in a pattern that complements the cookies.
- Step 4: For the final touches, consider drizzling the cakes with a bit of strawberry syrup or glaze (made by heating strawberry jam with a little water) to add an extra layer of flavor and visual appeal. Your cakes are now ready to be served and enjoyed. Remember, the key to a beautiful presentation is balance and simplicity, so don’t overdecorate – let the natural beauty of the ingredients shine through.
Handy Tips
- When baking the cakes, ensure your ingredients are at room temperature for the best results. This helps in achieving a lighter and fluffier texture.
- For the frosting, start with a small amount of milk or cream and add more as needed to achieve the right consistency. You want the frosting to be spreadable but not too thin.
- Experiment with different patterns for the Oreo cookies and strawberries to make the dessert truly unique. You could also add other toppings like whipped cream or chocolate shavings for extra texture and flavor.
Heat Control
If you’re baking the cakes from scratch, maintaining the right oven temperature is crucial. Ensure your oven is at 350°F (175°C) for the best results. It’s also important to not overbake the cakes – check them frequently towards the end of the baking time, and remove them from the oven when a toothpick inserted into the center comes out clean. For the frosting and toppings, no heat is required, making this part of the process very straightforward.
Crunch Factor
The crunch factor in this dessert comes from the Oreo cookies on top. To maintain their crunch, it’s best to add them just before serving. If you’re preparing the dessert ahead of time, consider adding the Oreos at the last minute to ensure they retain their texture. The freshness of the strawberries also adds a pop of freshness and texture contrast to the softness of the cake.
Pro Kitchen Tricks
- For a more professional finish, use a turntable to display your cakes, especially if you’re presenting them at a gathering or event. This allows the cakes to be easily viewed from all sides.
- Consider using a turntable to display your cakes, especially if you’re presenting them at a gathering or event. This allows the cakes to be easily viewed from all sides.
- Invest in a good quality cake stand or pedestal. This elevates the cakes, making them a centerpiece and adding to their visual appeal.
Storage Tips
- Store the cakes in an airtight container at room temperature for up to 2 days. If you live in a hot or humid climate, consider storing them in the refrigerator to keep them fresh for longer.
- Before storing, make sure the cakes are completely cooled. This prevents moisture from accumulating inside the container and making the cakes soggy.
- If you’re not serving the cakes immediately, you can also freeze them. Wrap the cakes tightly in plastic wrap or aluminum foil and place them in a freezer-safe bag. Frozen cakes can be thawed at room temperature when you’re ready to decorate and serve them.
Gift Packaging Ideas
If you’re giving these cakes as a gift, consider presenting them in a beautiful cake box or on a decorative cake stand. You can wrap the box with a ribbon and add a gift card with a personal message. For a more rustic or homemade feel, use a wooden crate or a vintage suitcase as a unique display and packaging solution. Adding a few extra Oreos and strawberries on the side, beautifully arranged, can also make the gift feel more complete and thoughtful.
Flavor Variations
- Different spices: Consider adding a pinch of salt or a teaspoon of cinnamon to the cake batter for an extra depth of flavor.
- Creative toppings: Besides Oreo cookies and strawberries, you could use other types of cookies (like chocolate chip or peanut butter cookies) or fruits (such as blueberries, raspberries, or blackberries) to create different flavor combinations.
- Ingredient swaps: For a gluten-free version, swap the regular flour with gluten-free flour. For a vegan version, use flax eggs and a non-dairy milk. These swaps allow the dessert to be enjoyed by those with dietary restrictions.
Troubleshooting
- Texture problems: If your cakes turn out too dense, it might be because the batter was overmixed. Try mixing the ingredients just until they come together for a lighter texture.
- Ingredient replacements: If you don’t have buttermilk for the red velvet cake, you can make a substitute by mixing milk with a tablespoon of white vinegar or lemon juice and letting it sit for a few minutes.
- Over/undercooking signs: Keep an eye on your cakes while they’re baking. If they’re undercooked, they’ll be soggy in the center. If they’re overcooked, they’ll be dry. Adjust the baking time as needed based on your oven’s performance.
FAQs
- Can I freeze it? Yes, you can freeze the cakes before decorating. Wrap them tightly and store them in a freezer-safe bag for up to 2 months. Thaw at room temperature when ready to decorate and serve.
- Is it gluten-free? The original recipe uses regular flour, but you can easily make a gluten-free version by substituting the flour with a gluten-free mix. Ensure that the Oreos you use are also gluten-free if necessary.
- Can I double the recipe? Yes, you can double the recipe to make more cakes. Just ensure you have enough pans and ingredients. Doubling the recipe is a great way to make these cakes for larger gatherings or events.
Conclusion
Making two cakes with Oreo cookies and strawberries on top, one white and one red, is a fun and rewarding baking project that’s sure to impress anyone who lays eyes on them. With their stunning visual appeal and delicious flavor combination, these cakes are perfect for birthdays, holidays, or just as a sweet treat to brighten up anyone’s day. Don’t be afraid to experiment with the recipe, trying out different flavors and toppings to make it your own. Whether you’re a novice baker or a seasoned pro, this recipe is a must-try for its simplicity, versatility, and the joy it brings to those who taste it. So go ahead, get baking, and share your creations with love and joy!
Two Cakes with Oreo Cookies and Strawberries on Top, One is White and the Other is Red
A recipe for two visually stunning cakes, one white and one red, topped with Oreo cookies and fresh strawberries, perfect for special occasions or as a sweet surprise.
🥘 Ingredients
👩🍳 Instructions
-
1Preheat the oven to 350°F (175°C). Prepare two 9-inch round cake pans.
-
2Mix the cake batter according to the recipe, divide it evenly between the prepared pans, and bake for about 25-30 minutes or until a toothpick inserted into the center comes out clean.
-
3Allow the cakes to cool completely before frosting and decorating with Oreo cookies and sliced strawberries.
-
4For the final touches, consider drizzling the cakes with strawberry syrup or glaze for added flavor and visual appeal.